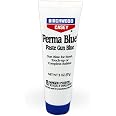
🔫 Elevate Your Firearm's Aesthetic with Birchwood Casey's Perma Blue!
Birchwood Casey's Fast-Acting Long-Lasting Perma Blue Paste/Liquid Gun Blue is designed for both touch-ups and complete rebluing of steel firearms. This high-quality product offers a non-streaky, even blue-black finish and is easy to apply without the need for heat. Trusted by professionals since 1948, it combines innovative craftsmanship with user-friendly application, making it a must-have for any serious shooter or gunsmith.


| Global Trade Identification Number | 00029057133226 |
| Item Package Dimensions L x W x H | 7.44 x 3.7 x 1.18 inches |
| Package Weight | 0.07 Kilograms |
| Item Dimensions LxWxH | 1 x 1 x 1 inches |
| Item Weight | 57 Grams |
| Brand Name | Birchwood Casey |
| Warranty Description | See Manufacturer |
| Model Name | Birchwood Casey Perma Blue Paste Gun Blue 2 ounce tube |
| Color | Multi |
| Suggested Users | unisex-adult |
| Number of Items | 1 |
| Part Number | BC-13322 |
| Style | 2 FLOZ TUBE |
| Size | One Size |
H**E
Follow the directions and don't rush the process for a great result.
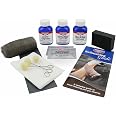
This is a review for Birchwood Casey PSP Gun Blue (3oz) bottle. First let me start by saying my purpose for using this product was not typical. I had some hitch rings that were steel with zinc plating that I wanted to make dark for a woodworking project I had. As this metal (although ferrous - as is required) was zinc plated, my hope was that scratching it with the 0000 steel wool Red Devil 0320 8-Pack Steel Wool, 0000 Super Fine would help open it up enough to reach the ferrous metal beneath.Please note the pictures included with this review for the process I used and the quality of the final product.Let me preface this by saying that disposable gloves and a clean work environment with paper towels or newspaper to catch any spills is advisable.First, I followed instructions:Prepping the metal:1) Cleaning the metal - They recommend their own brand of cleaner, of course - however I simply used some rubbing alcohol and cotton swabs, which worked well.2) With a small pad of steel wool, polish the metal lightly to remove old bluing and surface rust. Continue until metal is shiny. (I found that this was particularly important in the later stages when I found uneven darkening in my work. More on that later.)3) If the metal suffers from deep scratches and/or pitting, sand the affected areas with fine 280-grit paper followed by a steel wool polish. A file may be needed for deep pits. (This step wasn't necessary on my project as the metal was new and without any discernible blemishes.)4) Whatever you do, don’t try and rush metal preparation. Keep polishing until everything looks right. (This really is critical. Don't start applying the bluing until you have a good finished product that's blemish-free. Your finished work will thank you by looking great.)5) Re-apply the Cleaner & Degreaser, scrub with a sponge and rinse again with cold water. At this point, be careful not to touch the metal with your fingers as this can leave tell-tale marks after bluing caused by the natural oils from your hand. (Used rubbing alcohol for this process as well and the disposable gloves were on - saves your work from having an "oops". I can't stress this enough - you brush your arm, wrist, hand, finger, nose or whatever on the metal, you cannot see it. But the bluing will help you see it clearly later on.)Bluing:1) Apply Birchwood Casey Perma Blue Paste or Liquid Gun Blue with an applicator swab over the entire surface to be blued. Work as quickly as you can, but remember to be thorough. Rather than blueing the entire surface at one time, you may want to divide the work into 2 or 3 sections. (I found two things to be important with this step. One, be generous with your liquid. I don't mean pour the bottle over your project, but let your swab soak and don't squeeze it dry. Two, move quickly and smoothly over the metal - I was working on a 2" square surface plus a 2" ring - I did the whole piece in one shot, making sure to coat both sides of the ring plus the outer and inner ring with fresh dips into the bottle.)2) Allow the blueing to stand on the metal for 30-60 seconds. No longer. Then neutralize the chemical reaction by rinsing immediately and thoroughly with cold water and wipe dry. (30-60 seconds is plenty of time - seriously)3) After or during rinsing, polish very lightly with fine steel wool to blend the color if needed. If steel wool is used, you must use Cleaner & Degreaser again to remove any surface oils that may have been introduced. Appraise the blueing for coverage. If streaking exists or you desire a deeper/darker blue, simply repeat steps 1, 2, and 3 until the desired color is obtained. (After the rinsing - during the rinsing is kind of silly in my opinion as the water is going to distort what you see. The key here is VERY LIGHTLY. If you go heavy, you'll pull some of the bluing off. If you have spots that are darker than the rest, add a little pressure and they will even out. However, this is one a one step process, so don't worry too much about the color at this point.)4) Saturate all areas with Birchwood Casey Barricade Rust Protection and allow your new blueing to cure overnight. (Well, I used a very light coating of 3in1 oil and let it sit overnight, which gave it a fantastic finish and cleaned up quickly and easily. I should point out that for me, it took three coats to hit the level of darkness I wanted and to make it very even. On the last round, the metal never saw the steel wool. I rubbed it dry with a towel and lightly oiled it to let it sit overnight.)Overall I was pleased with the process and the outcome. It gave a fantastic browning to the metal which looked amazing on the wood project. Time will tell how well this will hold up, but if it fails, I'm going to assume it's due to the metal not being top grade ferrous metal and instead low grade metal with a zinc plating that needed to be bypassed.
D**Y
Good Buy!!!
Works quickly, great for touch ups.
P**N
Great
Worked like a charm gave it a nice finish .
B**Y
Great !!
Works great.
Y**Y
Works and looks great!!!!!!!
I used this Perma Blue paste to coat a vintage York Barbell. I used hardly any of the tube to cover about 4 feet of 1-1/16" bar with 4 or 5 coats. Key points to remember, first, get the base metal clean and scuffed uniformly! Any dark spots, discolorations, or deep sand scratches will stand out. Secondly, HEAT THE METAL! It's actually better if your surface is NOT hot, just warmed up slightly (let's say 110-120 degrees, warm to the touch). You could even leave your part in the sun for a few minutes to warm up. Get it too hot and the paste will dry quickly, be uneven, and come off in chunks (rather than allow you to spread it easily over the surface). Similar to you trying wax your car on 110 degree day in the direct sun. No good!FYI, I used acetone to clean the barbell before applying the first coat (and in between coats). First coat goes on a little uneven and blotchy. I let it setup for a minute or so, then rinsed the part off with water and a clean towel. You'll want to lightly scuff the part with a scotchbrite pad between coats (maroon worked good for me), after rinsing the previous coat off. I used a propane torch to heat my base metal back up to slightly warm (move quickly!!), then wiped it off with acetone/clean rag seconds before applying the next coat. Open flame may not be the best idea, but it worked flawless for my situation....just don't light your acetone rag on fire! Heat gun would be better for coating an actual firearm.Repeat the above process until you're happy with the color. The finished product will be evenly coated. You need to rinse it (obviously don't scuff it after the final coat!). End result is nice and smooth, not sticky, and not thick. Color is brown/bronze with this product when applied over bare (scuffed) steel.
J**
Super easy to use! Do not need that much either!!
As you can see I used this on a blade. I'm also going to use it on a barrel eventually. It's quite easy to use. Just degrease whatever you are blueing, clean it well, dry it off, then apply some of the goop and rub it in. I did a couple coats and when I was done I waited a couple days then went and used some whetstone powdered cloth and rubbed it down a lot after cleaning it again. The hamon is visible still too and it looks pretty cool. Then I applied some oil and all is well. I'm happy to have this as I will likely scuff up the blade during cutting practice, so after I re sharpen and polish the blade I can blue it again fast in the future.This will work on any steel I think. Super awesome stuff. You won't regret it!
R**Y
This Blueing works Well
I used this blueing on a scratched Mauser bolt from my 30.06 I used my dremmel tool to sand out the scratches, starting with 120, then 300, and finally 400 grit sanding drums. Wiped it down with MEK, then put 6 coats of Blueing on it, till it was a heavy shade of black. Finished with a coat of machine oil, and it matched perfectly..!
C**E
Not impressed
Have not tried on a gun yet. Tried on fishing lure not impressed
Trustpilot
1 week ago
1 month ago